How to Blackout Tail Lights – Simple Ways to Darken Your Car Light
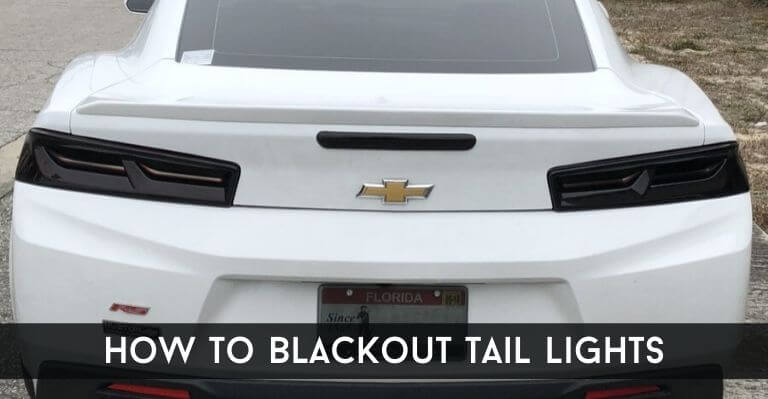
Car owners often find ways to modify and enhance the overall look of their vehicles. Blacking out the tail lights is one of the common customizations car owners opt for, as it quickly amps up the look. Some people prefer to tint their tail lights lightly, whereas others opt for black it out entirely. To help you with tinting your tail lights, here are two simple procedures that you can follow to get the desired look. However, black films and tail lights are prohibited in some states. So check with the guidelines of your state to avoid the fines and penalties for darkening the taillights.
How to Blackout Tail Lights
1. How to blackout tail lights with spray paint
The first procedure is for the people who want to tint their tail lights using spray paint. It is one of the preferred methods and beginners will also find this procedure smooth and hassle-free. For this procedure, these are the following supplies that you should get:

- Spray Paint in the preferred color
- 2000-grit sandpaper
- Masking tape
- Clear-Coat spray
- Wax
- Rubbing Compound
- Sponge
After collecting all the materials, follow this simple procedure step-wise to paint the taillights.
- For painting the tail lights precisely, it is recommended to remove the tail lights and then paint them. So unscrew the bolts and dewire the light bulbs as well as the carpet liner. Unscrew the lights and place them on the newspapers or tissue to avoid staining the floor or work station.
- Once you have removed the lights, wipe it off to clean it and then start sanding the surface of the tail light. Use 2000-grit sandpaper soaked in water to sand the surface as it helps in achieving pro-finish and also makes the paint last longer.
- Now mask the areas with the tape that you don’t want to paint. These areas can be the lights used for reverse. Cover the areas with masking tape depending upon the state laws to avoid the paint in those particular areas.
- Give a gentle shake to the paint spray can and start spraying the tint on the taillights. Apply an even and thin layer of the paint, let it dry for 20-30 minutes before applying the second coating.
- Apply the second coating of the spray paint once the first one dries completely. Wait for the second one to dry and then remove the masking tape from the taillights.
- Take the wet-sandpaper and sand the tail lights again to even out the paint and smoothen it.
- For the finishing touches, apply five-six coatings of the clear spray coat to give that glossy finish to your tinted taillights. Apply some rubbing compound on it to fill all the scratches caused due to sanding the lights.
- Lastly, wipe the lights with a microfiber cloth and start polishing the tail lights with wax and wipe it off with the cloth again. Reinstall the taillights, complete the wiring of the tail bulbs and screw it properly.
2. How to tint lights with the film
If you are among the people who find painting the lights a tricky business, then you can opt for this alternative way to darken your tail lights. For this procedure, you need a tinted film to darken the taillights. Collect the following supplies to complete the process:

- Film tint
- Hairdryer
- Squeegee
- Utility knife
- Microfiber cloth
- Spray bottle
Once you collected all the needed materials follow this step-by-step process to darken the tail lights:
- Like the first process, you also have to start this procedure by cleaning the taillights. For cleaning, you can use a solution of soap and water and fill it in the spray bottle. Clean the lights with the help of the soapy solution and microfiber cloth.
- Quick Tip: You can easily find the film tints in a supply store or also online, but make sure to buy the ones that are permitted in your state.
- Now get your film tint ready by peeling off the protective sheet from it. Spray the sticking side of the film with the soapy solution as it helps you to set the film properly onto the lights.
- Do a quick check to confirm if the film tint covers the tail lights completely. Once you are sure about its placement, stretch out the film tint on the taillights and start pressing it.
- You can start by pressing the film firmly on the flat surfaces first to ensure that it sticks and then proceed towards the curved part. To make sure that the film sets firmly, you can use a squeegee to even it out and remove the air bubbles.
- Keep flattening the film on the lights and push the air bubbles towards the edge of the lights. If during this, you find the film getting stiff or challenging to manage, then you can reapply the soapy solution again to restore the flexibility.
- Apart from the solution, you can use your hairdryer as the heat also makes the film manageable. Once you achieved an even application of the film, sans bubbles take a knife and cut the excess film tint.
- Make sure to trace the shape of the lights and leave an extra film on edge to stretch and tuck the film on the edges to get the perfect fit and finish.
Concluding Remarks
Both the above-stated methods work effectively to darken the taillights. You can decide the procedure you want to go with on the basis of the available supplies, state guidelines and your budget. Also, you can refer to online video tutorials as it can be of great help to guide you with the entire process. But remeber to refer the state laws before you start darkening the taillights. And lastly, be a responsible car owner and always follow the signals!